



Electric guitar pickups are responsible for amplifying an instrument’s tonal qualities. Guitar players looking for a dirty rock 'n' roll tone know the name Humbucker. This pickup is used as a stock pickup on many popular guitars. Although Humbucker pickups are well built, they can develop problems over time. A guitar technician can test the pickup to determine the problem, but the repair cost can be greater than the price of the pickup. Use a few professional techniques to test a Humbucker pickup, avoiding the cost of a trip to the repair shop.
Things You'll Need:
Things You Will Need

Remove the strings from the guitar in preparation for removing the pickup. Using a Phillips screwdriver, remove the screws that hold the plastic pickup ring to the guitar’s body. This allows access to the pickup. Separate the pickup from the ring by unscrewing the two set screws that hold the pickup in place. Lift the pickup out of the cavity and lay it next to the opening. The connection wires are long enough to allow the pickup to be lifted out and placed on the guitar’s body.
Using compressed air, blow out any dirt or debris from the pickup’s coils and soldering points. A flexible ribbon runs around the sides of the pickup. Insert the compressed air can’s nozzle behind the ribbon to clean the copper windings.

Look for damage to the pickup such as broken wiring within the copper windings, corrosion at the soldering points and windings and crimped lead wires. Make a note of the problems.
Place the black lead in the multimeter’s “COM” jack and the red lead in the “V (OHM) MA” jack. Set the multimeter to read ohms. The pickup should have a DC resistance between 9k and 12k, depending on the model of Humbucker. Set the multimeter’s ohms for this range. Turn on the multimeter.
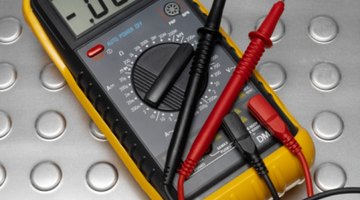
Connect the multimeter’s leads to the pickup. There are two wires leading out from the pickup. Place the multimeter’s black lead on the soldering point for the black wire. Place the red lead on the soldering point for the remaining wire, which is either white or red.
Compare the multimeter’s reading with the Humbucker’s normal resistance levels. If the pickup was purchased separately, the resistance levels will be listed in the owner’s manual. If the pickup came with the guitar and no manual is available, refer to the manufacturer’s website for the resistance levels. Replace the pickup if the levels are not within 15 percent of the target resistance level range.